
Upcycling: How To Transform an Old Sweater From Cheerless To Glamorous
Browsing the aisles of a local thrift store, I was struck with sadness for all the sweaters in need of a home for the holidays. From cable knit to cashmere, I couldn’t help but feel pity for their forlorn existence, despite the vibrant facade amidst the framework.
Taking matters into my own hands, I realized that the simple solution was to upcycle, a process in which new life is added to clothing through a DIY makeover. By upcycling one of these sweaters, I had the opportunity to cultivate a mutually beneficial relationship. I hoped to elevate the sweater’s status from drab to fab, and in return, I would gain a one-of-a-kind piece to my winter wardrobe arsenal.
Read on to discover how to craft the perfect gift this holiday season, whether it be for yourself or a friend!
Step 1: Secure your Sweater

Browse your local thrift store or your own closet to find a sweater that needs a little TLC. Important factors to consider include style, colour, and material. For the sake of this project, I recommend a sweater that is minimally textured in appearance, so as to let the pearls be a statement on their own.
*if we want to link the thrifting guide article like how that was done in the previous upcycling piece we could do that here! i.e. “Thrifting first timer? Check out this article for tips on how to encounter the best second-hand store finds!” *
Step 2: Gather Supplies

In addition to a sweater, you will need flat back pearls, gem adhesive, and bead tweezers. Choose white pearls for a classic look, or multi-colored ones to add instant charm to a drab knit. Find the above supplies on Amazon or at your local craft store.
Step 3: Bring on the Glam
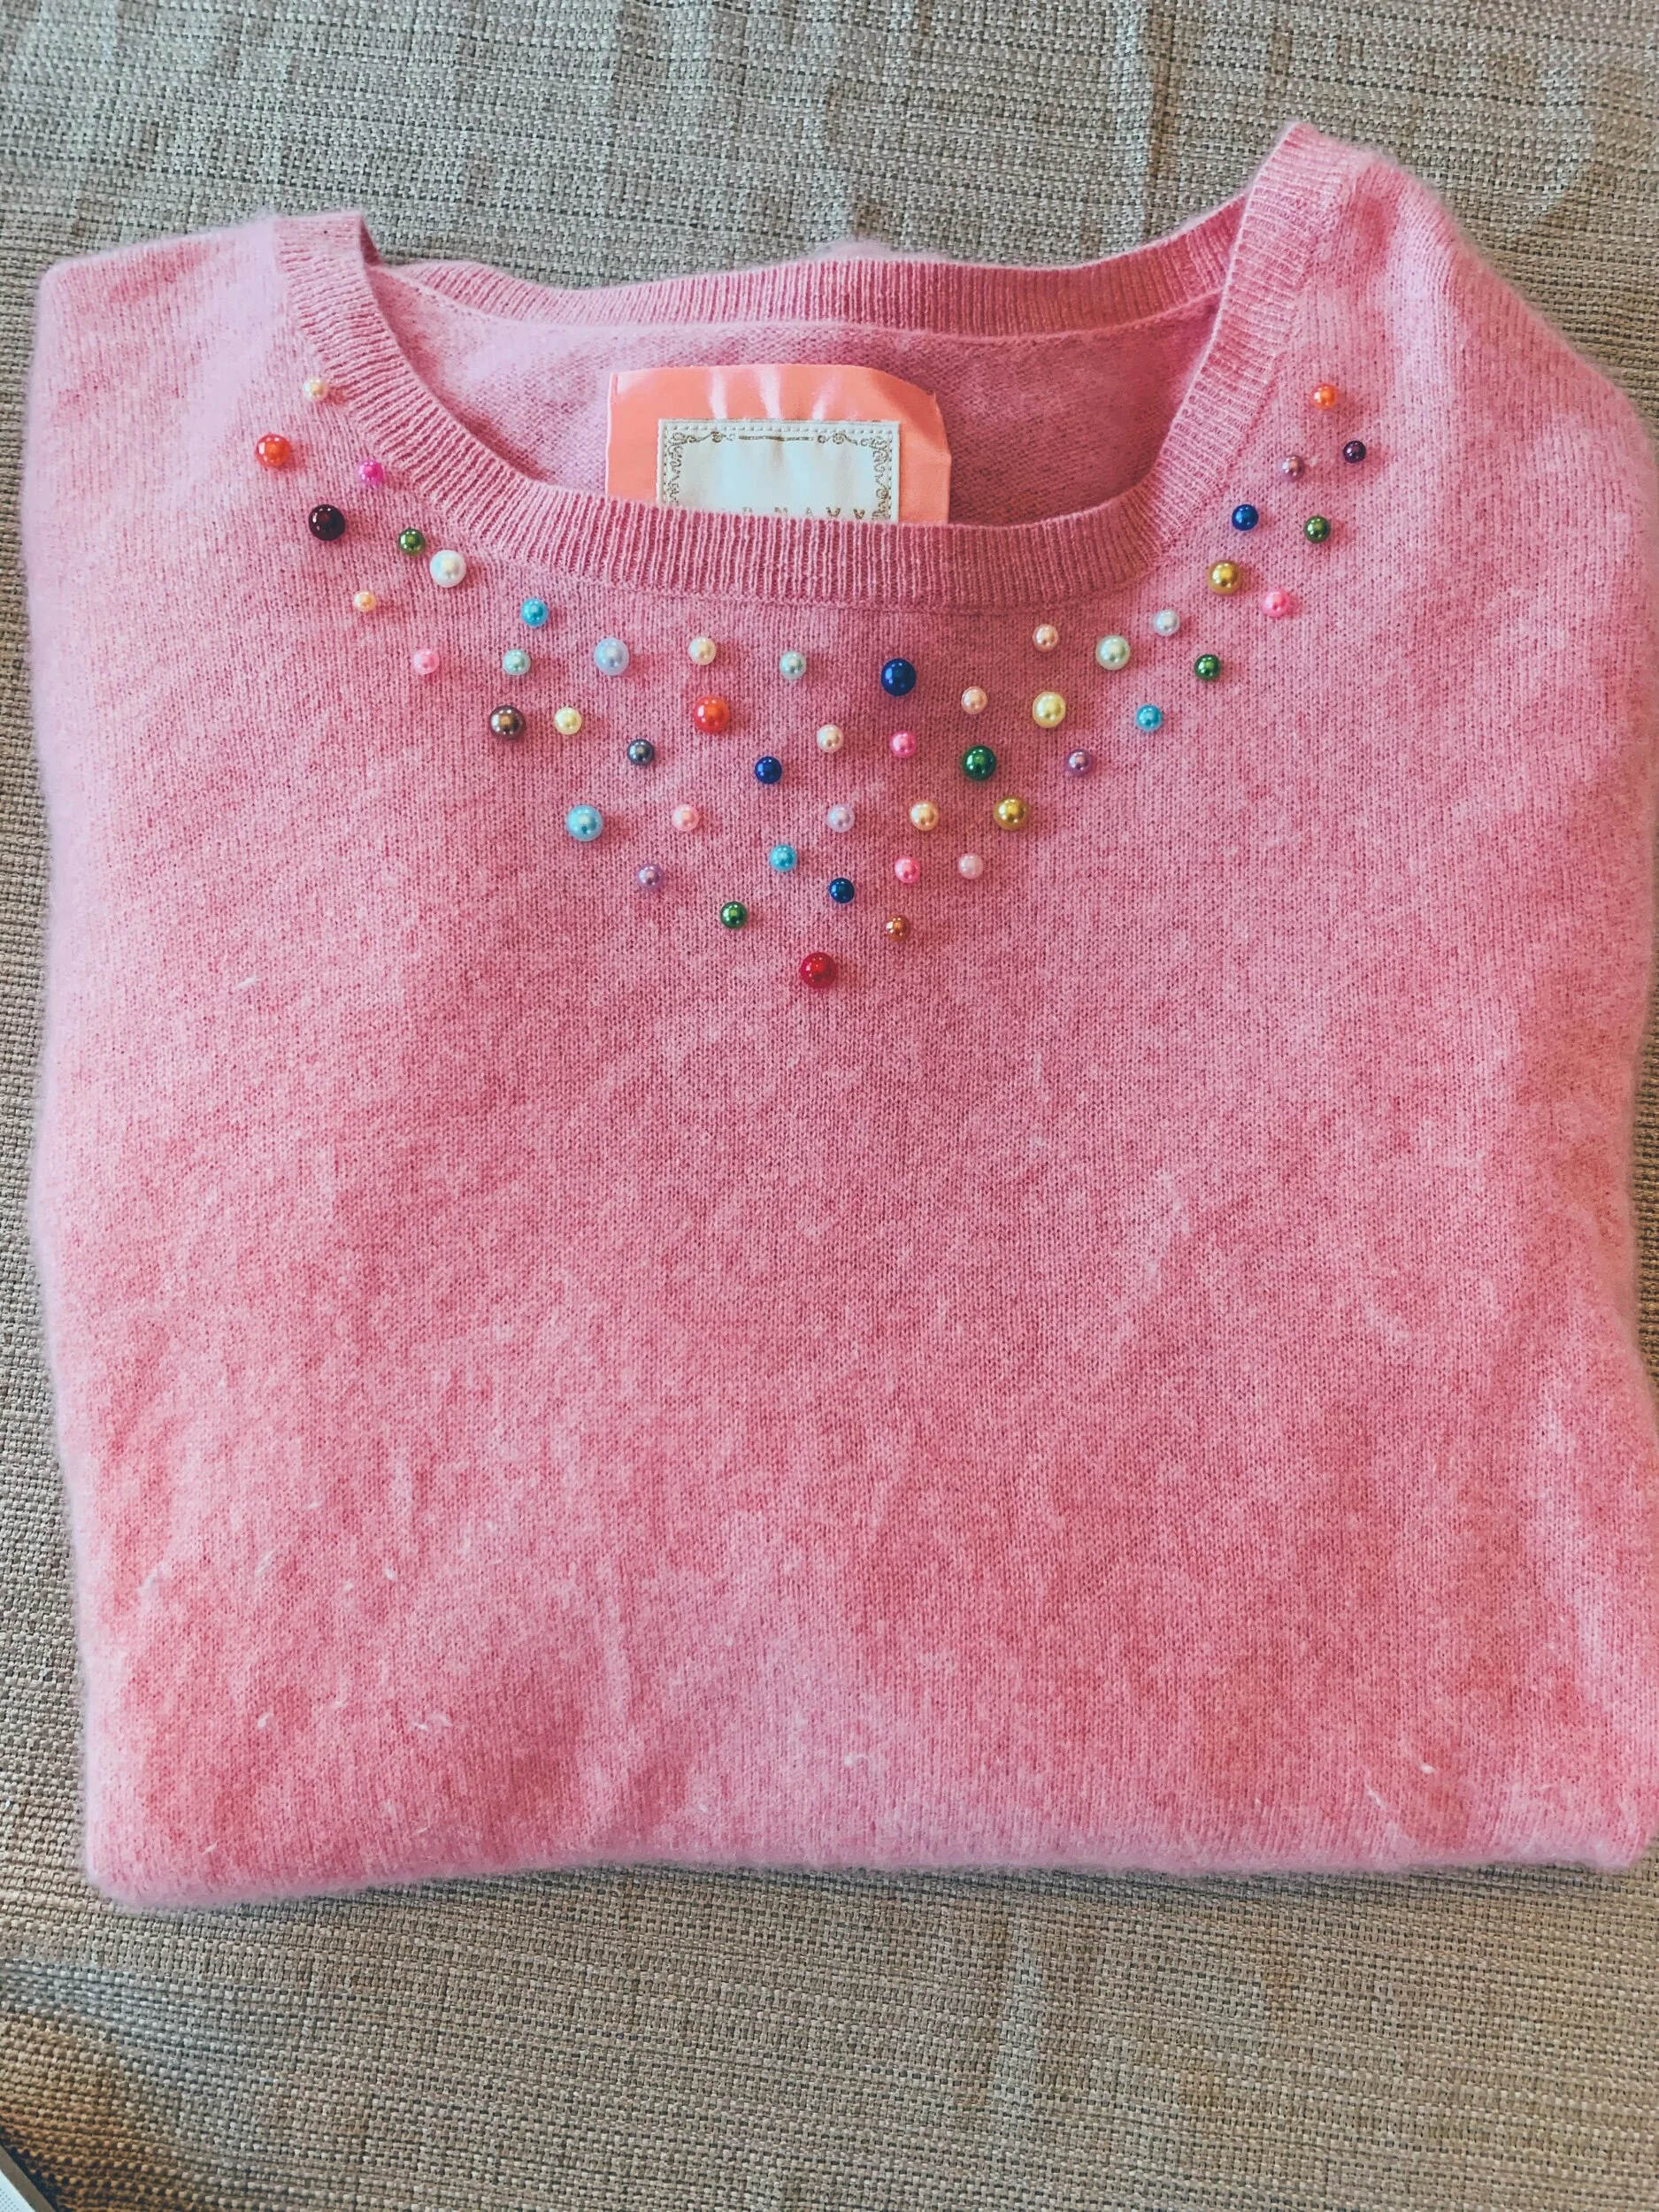
Determine the positioning of the pearls on the sweater. Be creative; the world is quite literally your oyster! Some possibilities include adding an accent to the sleeves, pockets, or shoulders. I chose to emphasize the collar, creating the appearance of a necklace. Once you have laid out the pearls in place, use the tweezers and adhesive to secure them in place one at a time. Let dry for two hours to ensure optimal attachment.
GO FORTH BOLDLY WITH YOUR ONE-OF-A-KIND DESIGN!
Whether you choose to save it for yourself or gift it as a holiday present, this unique piece is sure to be a hit.